Excel and CSV file upload
You can upload data from Excel and CSV files to flex.bi and then create reports, charts and dashboards from these data.
Please at first read about flex.bi cubes, dimensions, and measures – you will need to understand the multi-dimensional data model to be able to map source file columns to cube dimensions and measures.
Upload files
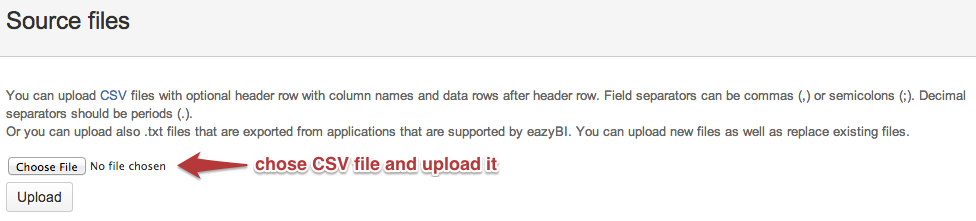
Go to the Source Data tab and select the source file for upload.
If you upload CSV files then use either comma (,) or semicolon (;) field separators. Decimal values should always use periods (.) as decimal separators. Commas (,) in integer and decimal values will be ignored (e.g. if they are used as thousands separators).
If you upload Excel files then integer, decimal, and date fields will be detected based on Excel cell formatting.
If the source CSV file contains non-English characters then the CSV file should be in UTF-8 encoding as otherwise, you might receive error messages when previewing the uploaded file.
If your original non-English data are in Microsoft Excel then upload these Excel files as Excel export to CSV does not support UTF-8 encoding.
After the CSV file is uploaded you can click Preview to specify source file columns mapping.

Source file preview
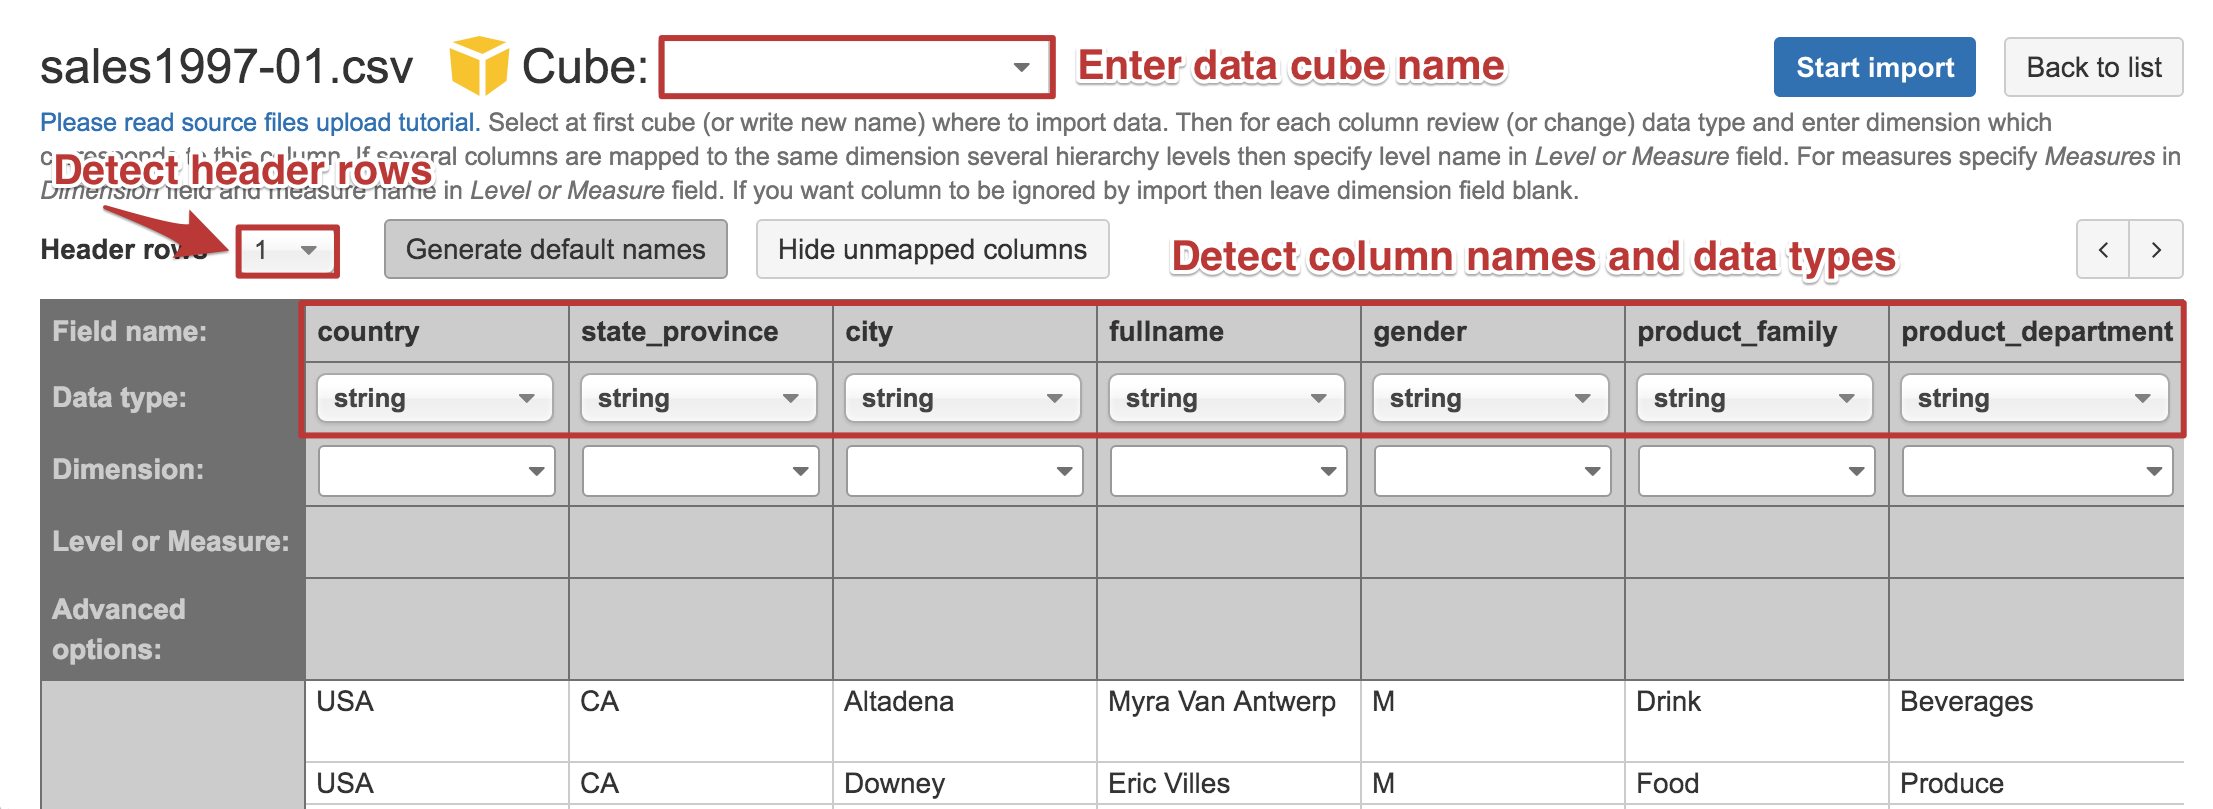
In the source file preview, you can enter the data cube name where you would like to import your data. If this is new data set then enter a new cube name (e.g. Sales cube if you are importing sales transactions). You can also import a new file in the existing data cube – in this case, you can use either existing cube dimensions and measures or specify new ones (which will be added to the existing cube during import).
It is recommended that the CSV file has a header row with column names - flex.bi will try to detect if your CSV file has a header row or not. If flex.bi has detected it incorrectly then please change the number of header rows (e.g. specify 0 if you do not have any header row).
flex.bi will try to detect each source file column data type based on the first 100 rows of the source file. Detected column types (string, integer, decimal, date, or datetime) are shown below each column name. If some column type is detected incorrectly then you can change it (e.g. change from integer to string if this column might contain also non-integer values).
Column mapping to dimension and dimension level
Next, you need to map source file columns to cube dimensions and measures.
By default, flex.bi will suggest mapping string columns to the dimension with a name which is derived from column name (underscores replaced with spaces, each word is capitalized). If necessary then you can enter a different dimension name that you would like to use in flex.bi.

You can map each column to a separate dimension but sometimes it would be better to map several columns to the same dimension but different hierarchy levels. In this example, it would be better to map country, state_province, city, and fullname to the same Customers dimension with hierarchy levels Country (highest hierarchy level), State Province (one country expands to several states or provinces), City (one state or province expands to several cities), Customer Name (one city expands to several individual customers). It is important that in the source file hierarchy level columns are always in the sequence from the highest hierarchy level to the lowest hierarchy level.

When you map several columns to the same dimension then you can select the existing dimension name from the list for the following columns (delete suggested default dimension name to see the list of available dimension names).
If you map several columns to the same dimension then it is mandatory to specify the dimension hierarchy level for each column. By default, the hierarchy level name will be generated from the column name (in the same way as the default dimension name). If necessary then you can enter a different dimension hierarchy level name.
.png?inst-v=7e2af186-e90f-4ec5-8799-7ecb260c56e5)
Ignore columns
If you would like to ignore some columns during import (do not want that these columns are imported) then you should leave dimension selection blank for this column.

Time dimension
Date or datetime column by default will be mapped to the Time dimension. Time dimension after import will automatically create year, quarter, month, and day hierarchy levels as well as an additional weekly hierarchy with year, week, and day hierarchy levels. Therefore you should not provide any dimension hierarchy level information in source file mapping as time hierarchies will be created automatically.
You should use one of the following date formats in your CSV file that flex.bi will recognize as date format and you will be able to import it as Time dimension:
- YYYY-MM-DD
- YYYY.MM.DD or DD.MM.YYYY
- YYYY/MM/DD or MM/DD/YYYY
The following datetime formats are recognized (currently only the date part of the datetime value will be imported in the Time dimension):
- YYYY-MM-DD hh:mm:ss or YYYY-MM-DDThh:mm:ss (ISO 8601 datetime format)
YYYY.MM.DD hh:mm:ss or DD.MM.YYYY hh:mm:ss
YYYY/MM/DD hh:mm:ss or MM/DD/YYYY hh:mm:ss
.png?inst-v=7e2af186-e90f-4ec5-8799-7ecb260c56e5)
Measures and integer and decimal columns
Numeric columns (integer and decimal data types) by default will be mapped to Measures and you need to specify measure names for these columns (by default derived from column names). Measures are values that you would like to analyze across other dimensions and which will be aggregated by other dimensions hierarchy levels.
If you have other integer values (most typically e.g. identifier columns like customer ID or order ID etc.) in source file columns then do not map them to Measures - either enter corresponding dimension name or leave dimension name blank to ignore them during import.
.png?inst-v=7e2af186-e90f-4ec5-8799-7ecb260c56e5)
Column mapping and import errors
When you have completed columns mapping to dimensions and measures then click Start import to import source file data into the specified data cube. If there will be any missing information in source file columns mapping then you will get an error message about missing information and columns with errors will be highlighted:
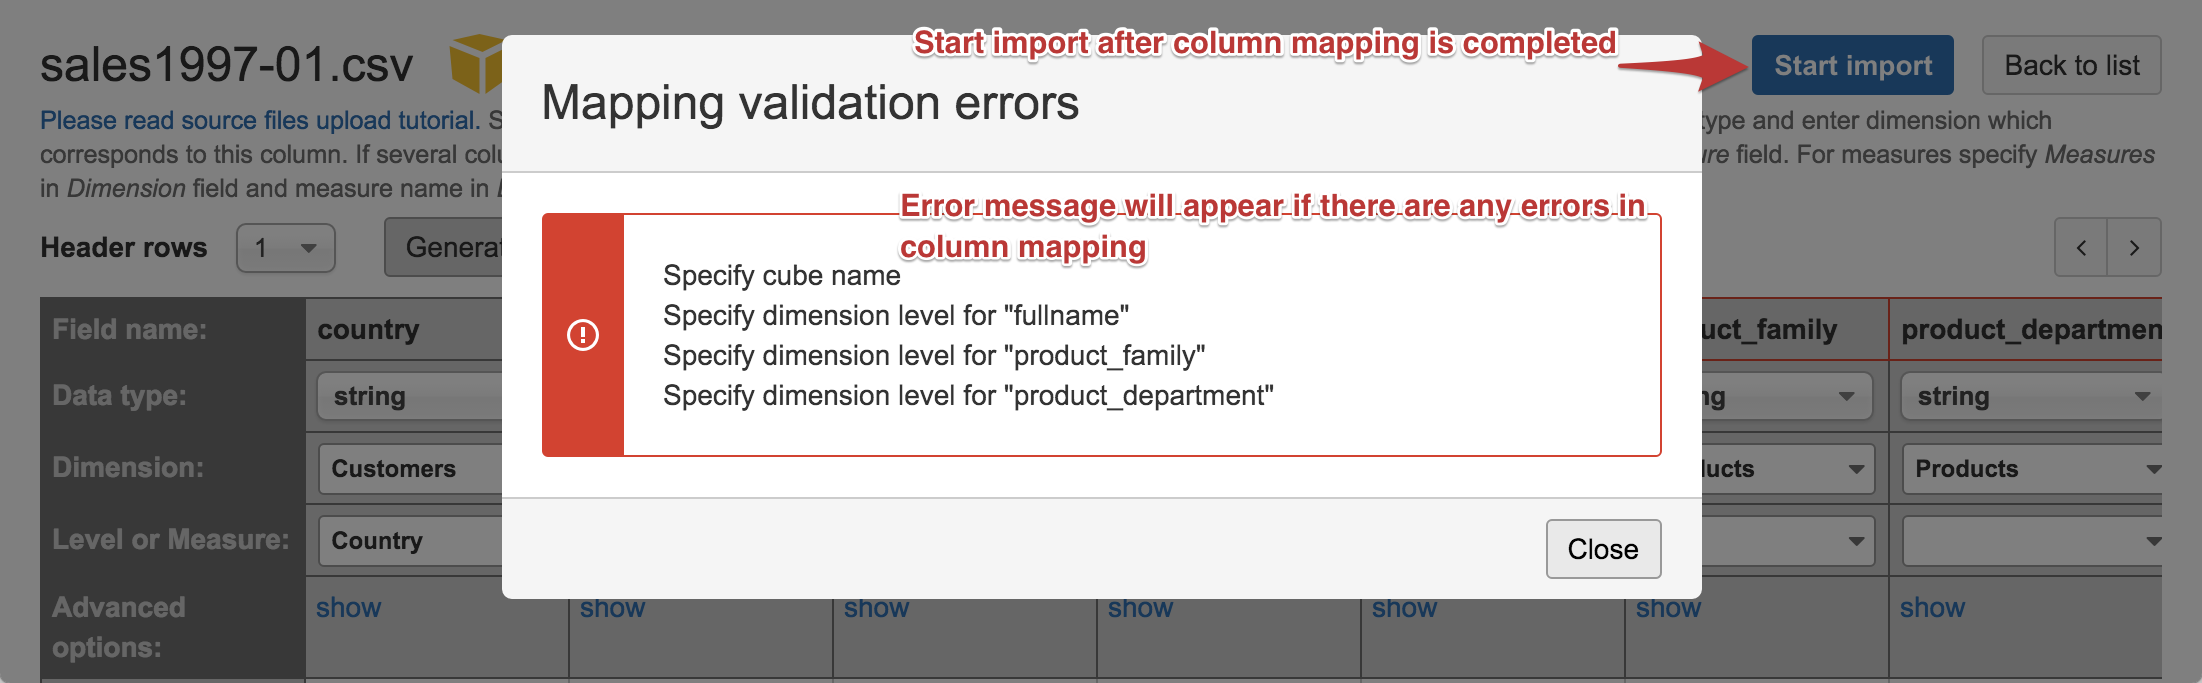
If there are no column mapping errors then source file import will be started in the background and you will see file import status (and how many rows are imported) which will automatically refresh.

If all source file rows will be imported successfully then the source file status at the end will change to Imported.

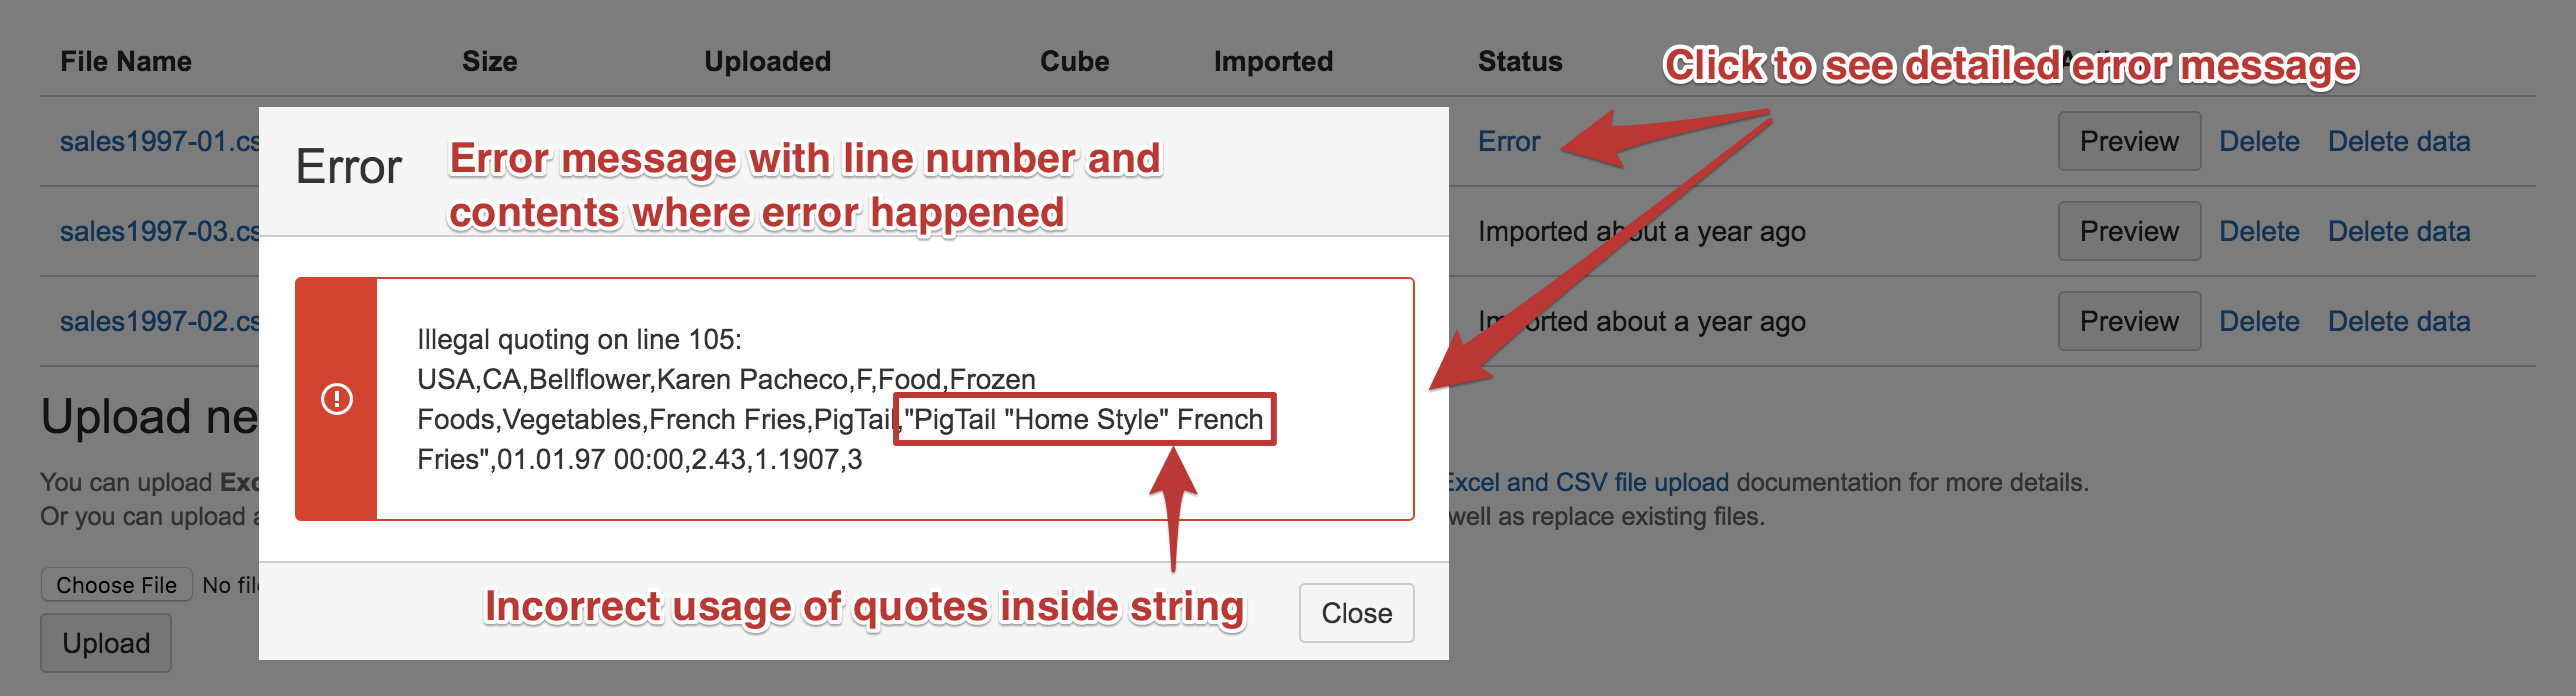
If there will be any errors during source file import then it will stop on the first error with the Error status. You can click on the Error link to see the detailed error message. The detailed error message will show the line number together with the line content and information about the error. The most frequent error is invalid quotes inside a quoted string (in CSV files you should double quotes inside the quoted string) or non-English character encoding (not in UTF-8 encoding).
Replace or delete source files
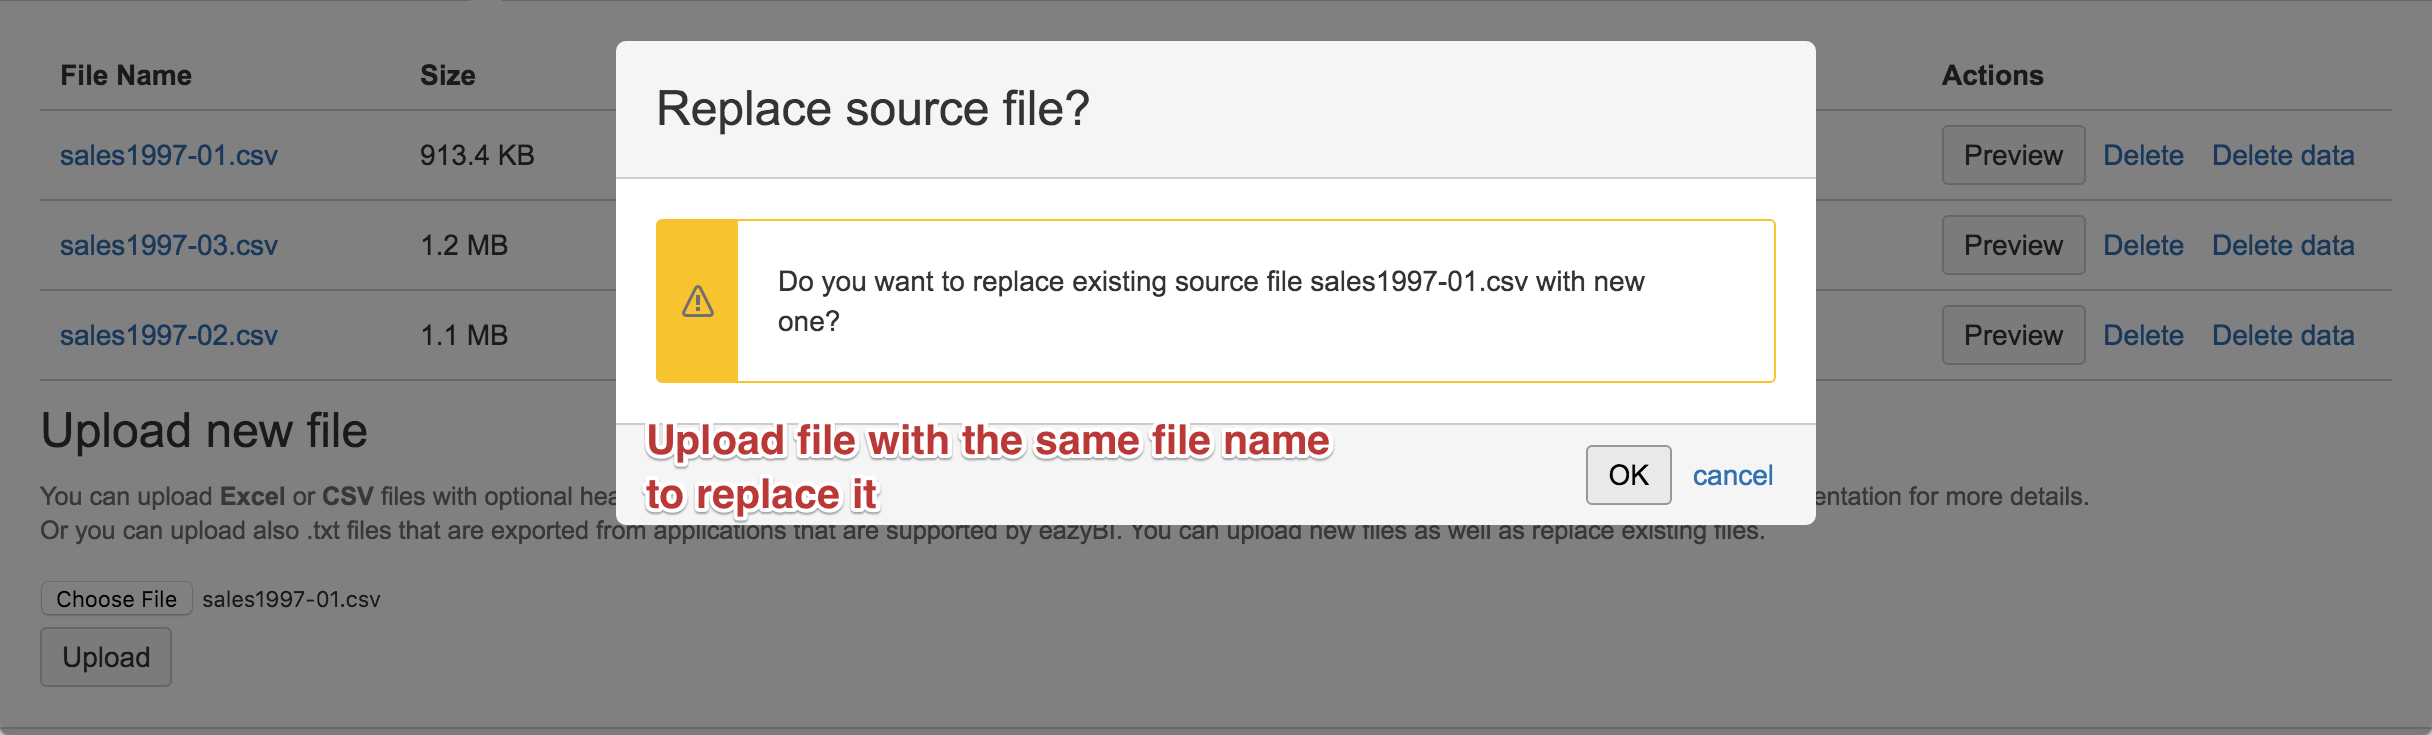
If you have an error in the source file then you can fix it and upload the file again with the same file name – you will need to confirm that you really want to replace the uploaded file. When you will import the replaced file then at first all previously imported rows from the previous file will be deleted and after that rows from the new file will be imported.
You can replace also successfully imported source files. If you regularly perform full export of your data from some source system then you can always use the same source file name and replace the previous version with the new one and replace all imported data with new.
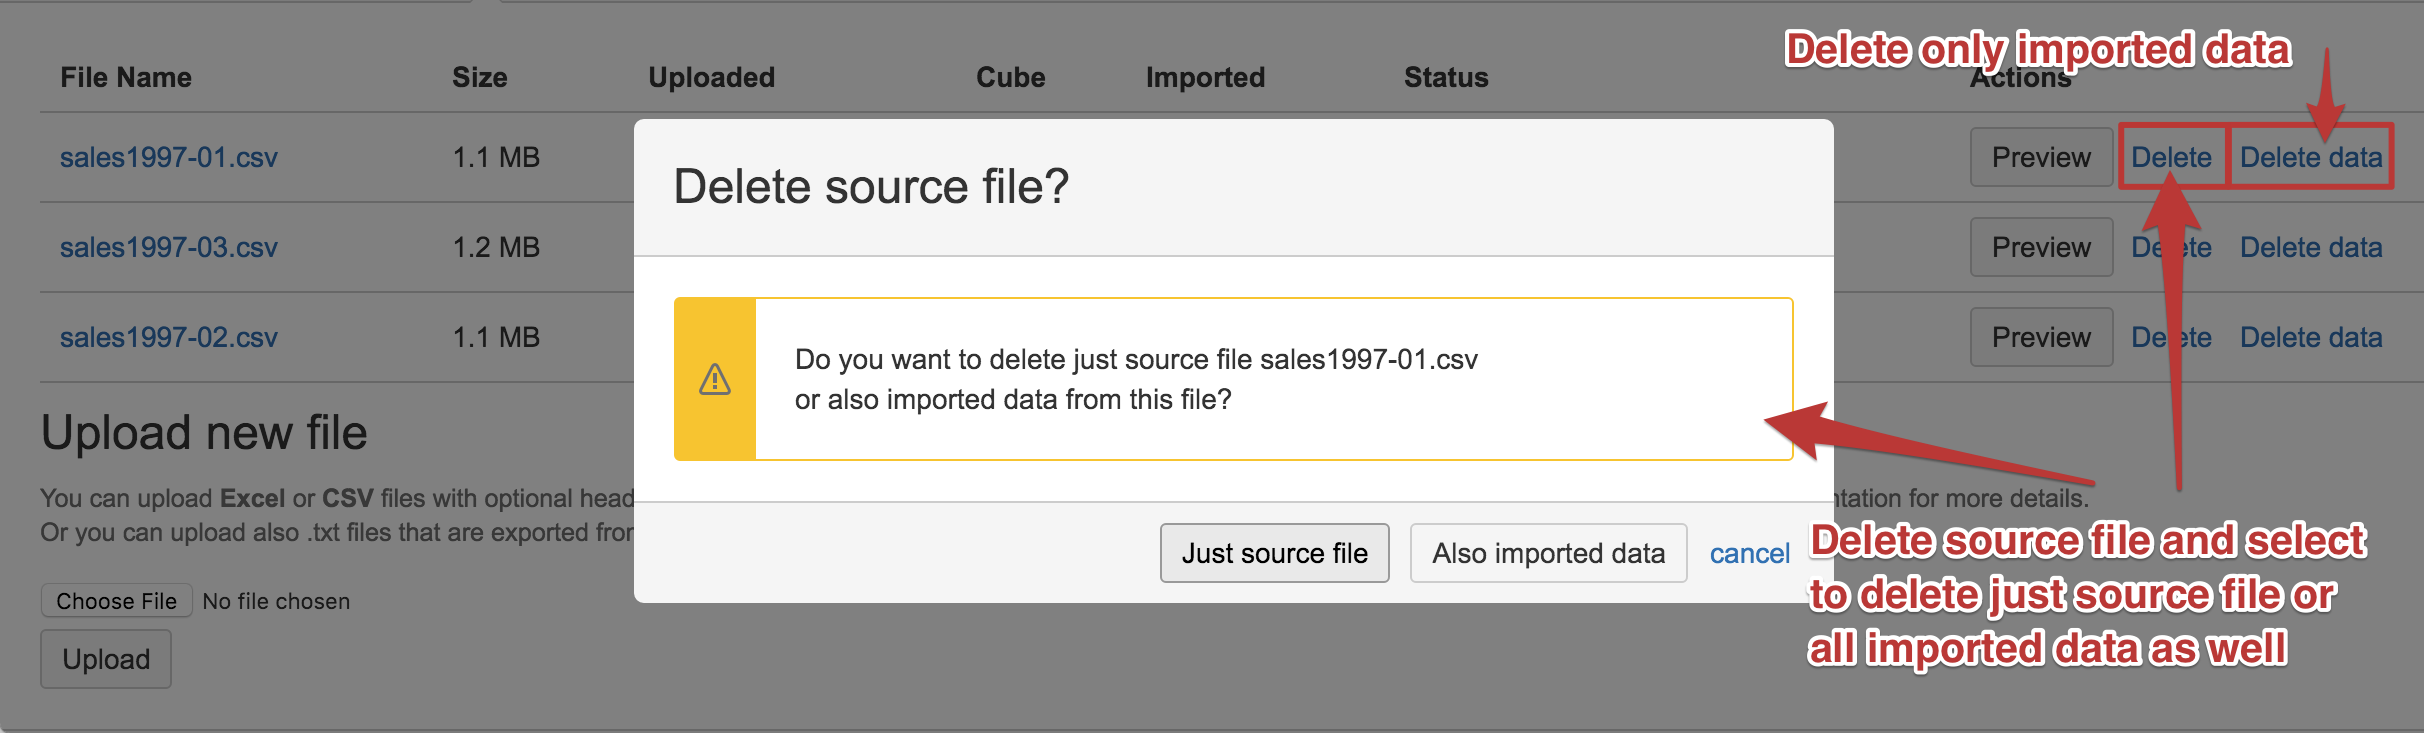
You can also delete either successfully imported files or files in error status. When deleting the source file you need to specify if you want to delete just the source file or to delete also all imported data from this source file into the data cube.
Import additional source files
If you will import additional data with the same source file structure (e.g. if you each day, week, or month import new data for this time period) then use a unique file name for each time period.

If the new source file has the same structure (same column names and data types) as the existing imported file then columns mapping will be copied from the already imported file. After clicking Preview you will be able to import it by clicking Start import.

Note that all data cubes in one flex.bi account share the same dimensions. If you want to use the same dimension in different data cubes then use the same dimension name. If they are different dimensions then use different dimension names (even when you use different data cubes).
Import additional measures in source application cubes
If you are using flex.bi standard integration with other source applications (e.g. Basecamp, Highrise, Jira, Zendesk or Harvest) but you would like to add additional measures to your source application data cubes then it is possible to import additional measures from CSV files in existing source application data cubes.
But there is also a risk that you will not prepare correctly additional data in CSV files which may result in damaged existing source application data. If necessary contact flex.bi support and describe your need and we will help you prepare correctly CSV files with additional data.