Database migrator functionality allows migrating the Private flex.bi database from one server to another and via file export/import.
flex.bi stores all data in a database. You can use the flex.bi database migration tool to move data from one server to another. It is also possible to choose some select flex.bi accounts to migrate the data to the new flex.bi database.
If you would like to migrate an existing flex.bi database to a new server, then first, set up a new flex.bi database and start Private flex.bi using this new database.
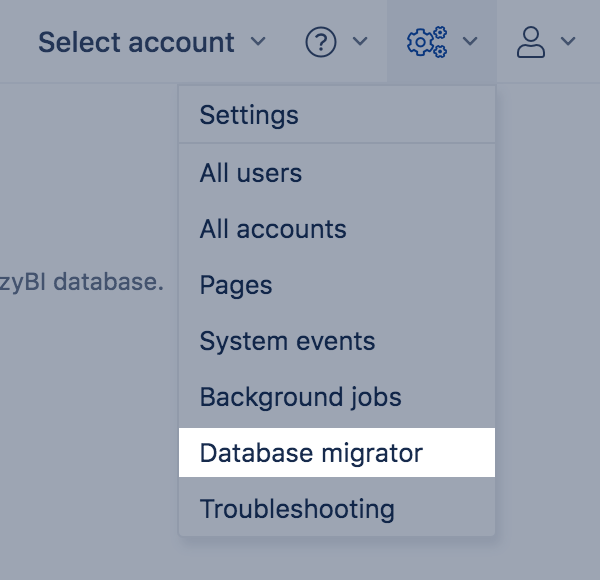
To access the flex.bi migration tool, click on the cog icon on the top right corner, and in the dropdown menu, select Database migrator.
Migration types
From another database into this Private flex.bi
Connect the new Private flex.bi installation to an existing Private flex.bi database and pull the necessary data.
If you would like to migrate an existing Private flex.bi database to a new server and the new server can connect to the existing one then, start with a new Private flex.bi installation and set up a new Private flex.bi database.
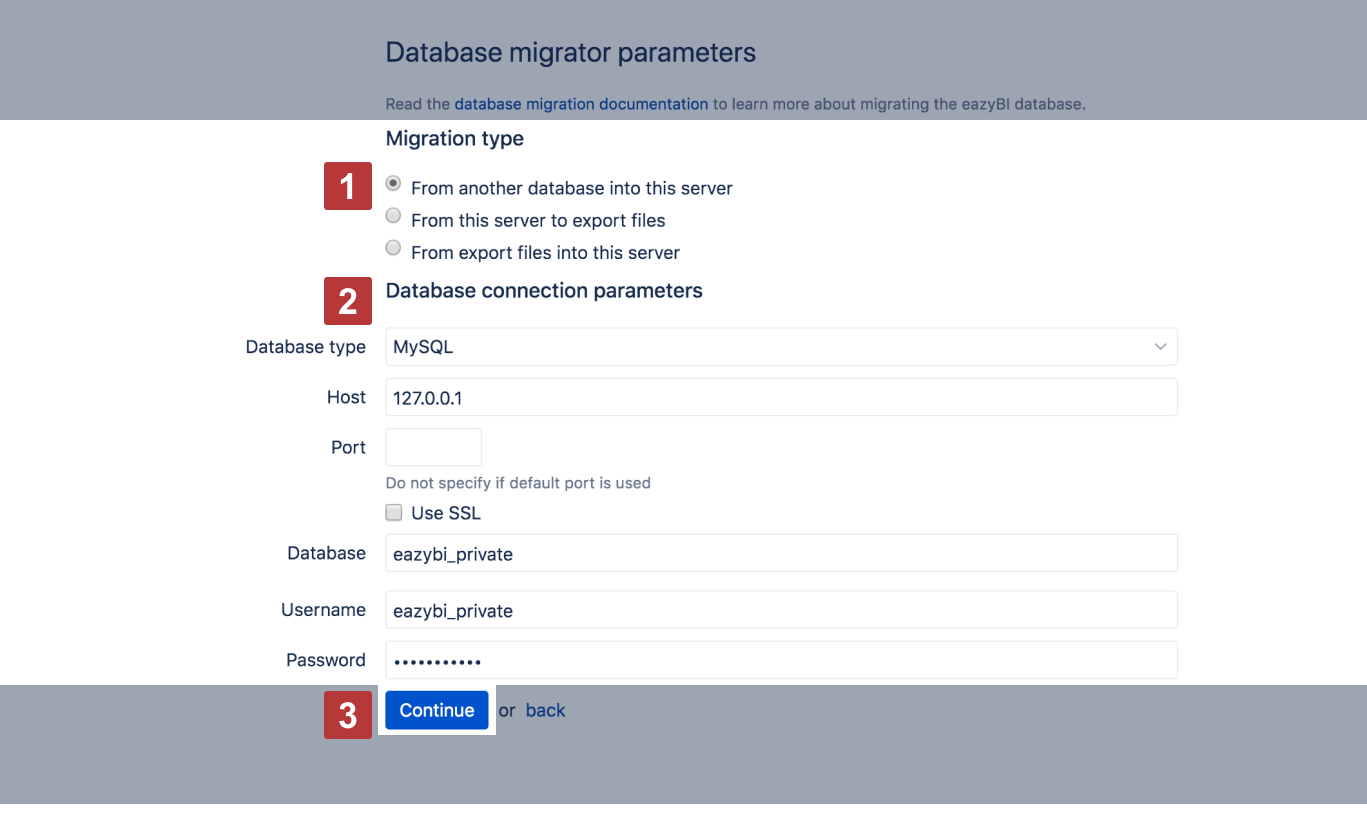
After that, open the flex.bi database migrator in the new Private flex.bi installation and select the option to migrate data from another database into this server [1]. Then specify the database connection parameters to the existing Private flex.bi database [2] from which you would like to migrate the data.
Click Continue [3], and if there will be any problems with the database connection, then the errors will be displayed. If the connection to the database will be successful, then you will be forwarded to the Select data for migration page.
File export/import
Export flex.bi data from the existing Private flex.bi database and import the file in the new Private flex.bi installation.

If the server with the new Private flex.bi installation can not connect to the existing flex.bi database, but you still have physical access to the existing Private flex.bi installation, you can try to export all the information to a *.ZIP file.
First, open the flex.bi database migrator in the existing Private flex.bi installation and select the "From this server to export files" [1] migration type. Click Continue [2]. You will be forwarded to the Select data for migration page to select the flex.bi accounts to export into the file. Afterward, you can download the file.

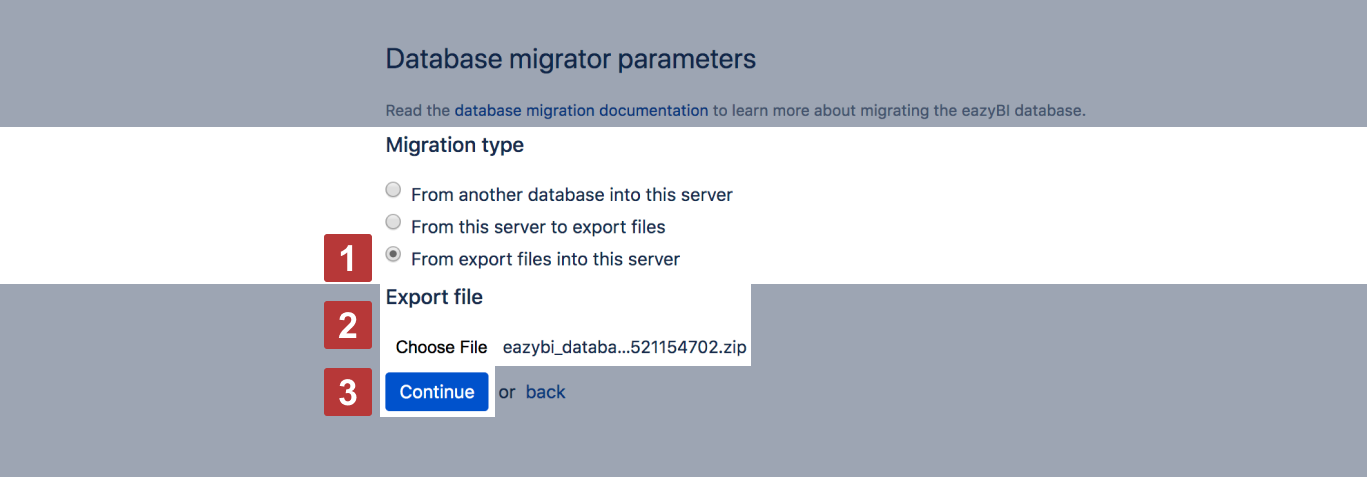
After that, open the flex.bi database migrator in the new Private flex.bi installation and select the option to import data from the export file into this server [1]. Select the file [2] you exported from the existing server and click Continue [3]. If there are any problems with the file, then the errors will be displayed. You will be forwarded to the Select data for migration page to select the accounts you want to migrate into this server.
Select data for migration
The list of flex.bi accounts [1] will be displayed, which are available for import. If some of these accounts are disabled (greyed out) [2], then it means that either they are already imported, or there are existing accounts with the same name in the current flex.bi database.
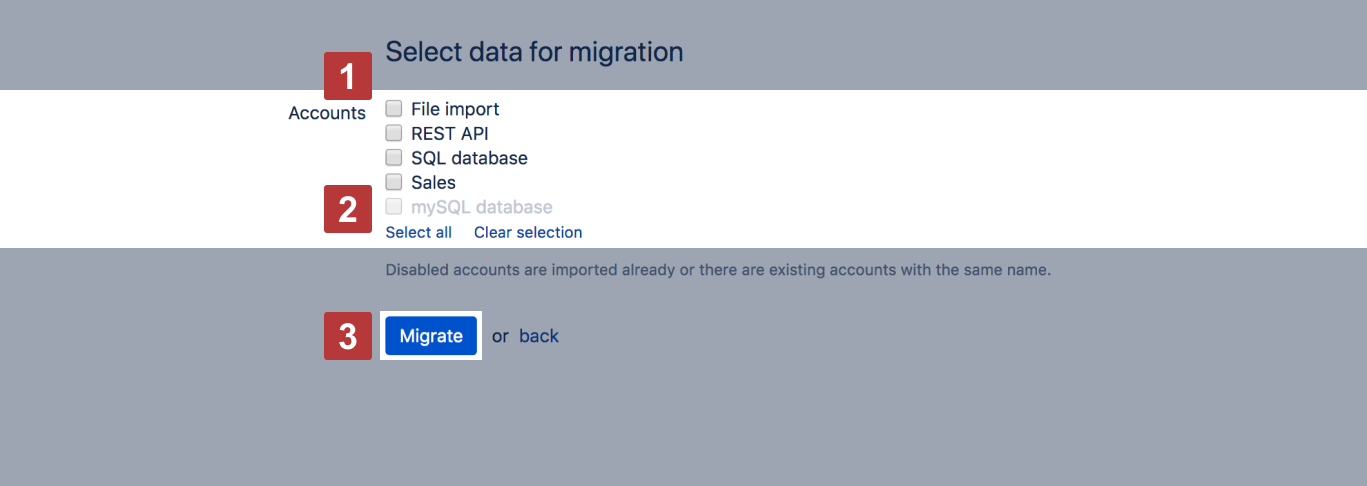
Select all or some accounts that you would like to migrate and click the [3] Migrate button.
If you migrate an existing flex.bi database to a new empty database, then the Preserve original IDs option will be available and selected by default. With this option selected all existing account, report and dashboard ID values will be the same as in the original database. When you publish flex.bi reports or dashboards using iframes or as gadgets then these IDs are used as a reference.
The migration will copy the following data from the source database to the current database:
-
Accounts
-
Account users
-
Source application definitions (without imported data)
-
Source file definitions (without uploaded files)
-
Cube definitions (with no data)
-
Cube report definitions
-
Calculated member formulas
-
Dashboard definitions including email subscription settings
Re-import source data
Only source applications (like HansaWorld, Jira, REST API, or SQL) definitions will be migrated. No source data are migrated. After the migration, go to the Source Data tab of each migrated account and verify the selected import options.
Finally, start the data import from all source applications. After the data import, you can go to the Analyze tab and open your existing reports.
If you had any uploaded source files, then please re-upload them in the Source Data tab and re-import data from all source files.