To use Google Spreadsheets as a data source, you need to add authentication keys for the Google Spreadsheets source application.
To do this, follow these instructions:
-
Create a project (or use an existing project) at https://console.developers.google.com. (If at any point you do not have permission to add or edit, make sure you are on the right project.)
-
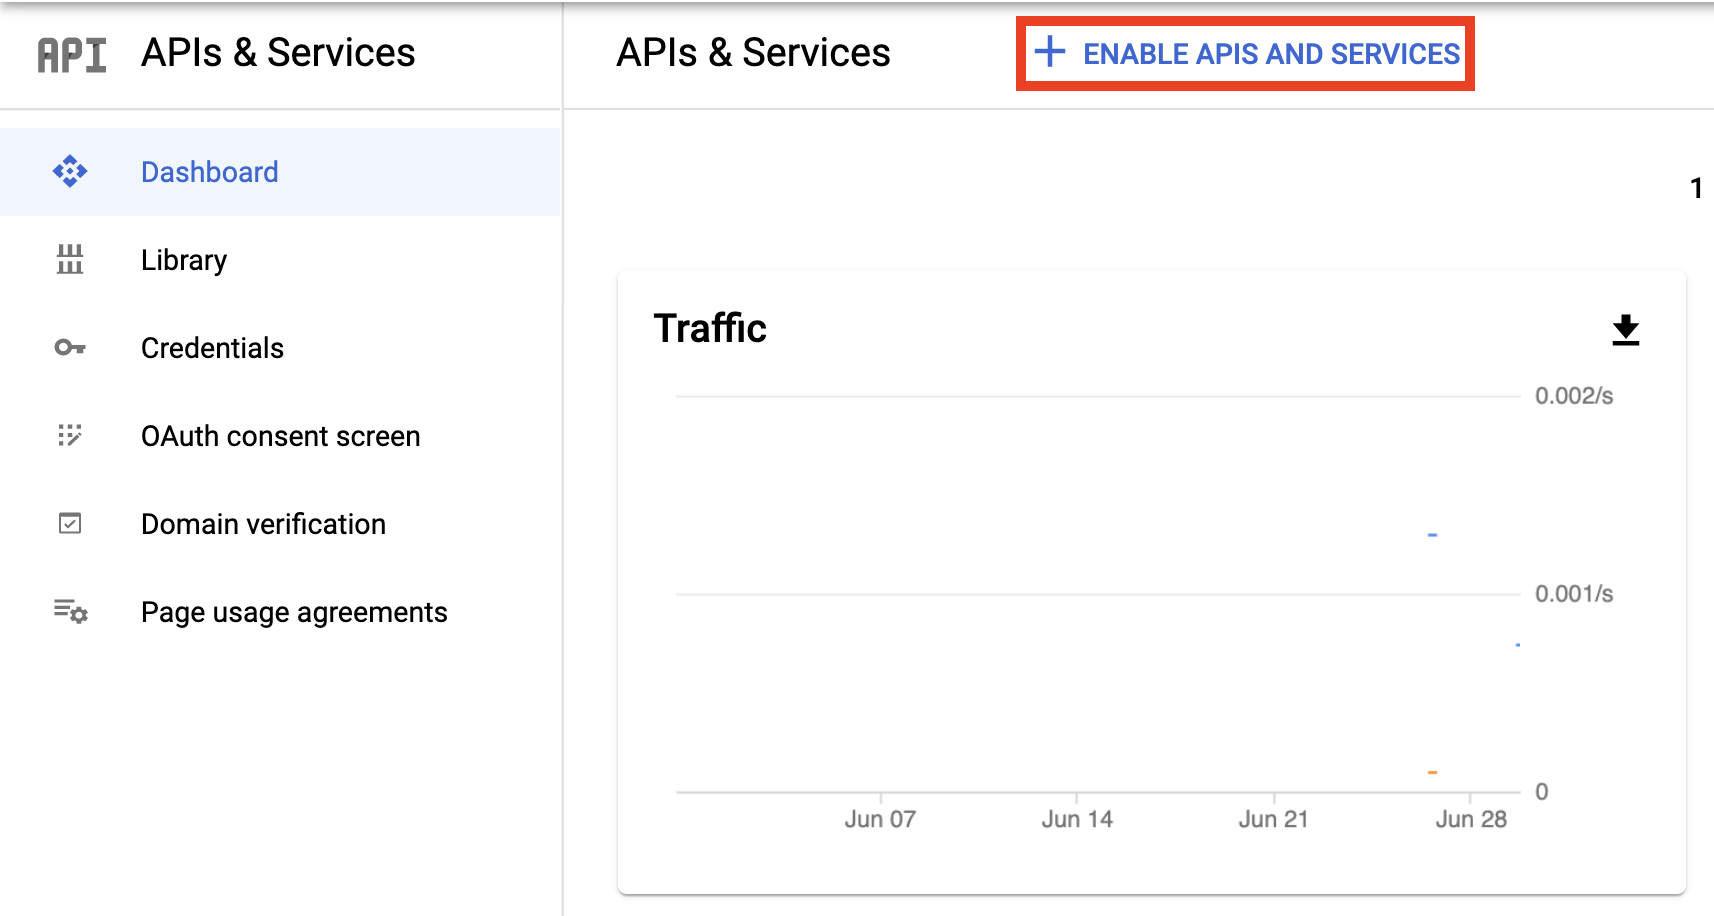
In the Dashboard section, go to Enable APIS AND SERVICES and enable Google Drive API and Google Sheets API.
-
Add the Google Drive API to the created project.
-
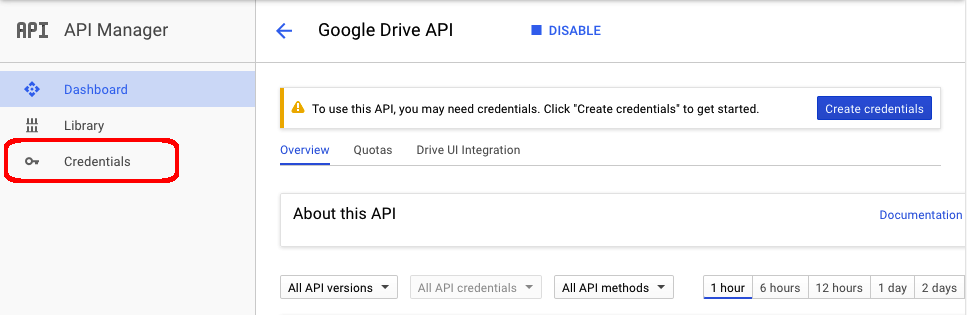
Go to the Credentials section displayed on the left sidebar.
-
In the Credentials section, create a new OAuth clientID.
-
Choose the Web application type.
-
If prompted, follow the instructions to verify your domain and configure your consent screen.
-
In the Authorized redirect URIs section enter the URI in the following format and press Create. (Change
flexbito the prefix that you have set up in thestart.shfile.)https://www.example.com/flexbi/source_applications/auth/google_spreadsheets/callback
-
Enter the Client ID and Client secret inside your flex.bi
config/eazybi.tomlfile:[source_application.google_spreadsheets] client_id = "..." client_secret = "..."
-
Add "
google_spreadsheets"to theapplication_tupeslist in yourconfig/eazybi.tomlfile:application_types = "jira", "rest_api", "sql", "hansaworld", "google_spreadsheets" ]
-
Restart flex.bi Enterprise service.
If you are receiving a "This app isn't verified" error, when creating a Google Spreadsheet, consider joining your user to the
"Risky access by unreviewed apps group"
or submit an
app approval form
to Google