Jira Issues Import
Initial Import
After creating an flex.bi account, you need to import in the flex.bi database selected Jira project issues that you would like to analyze.
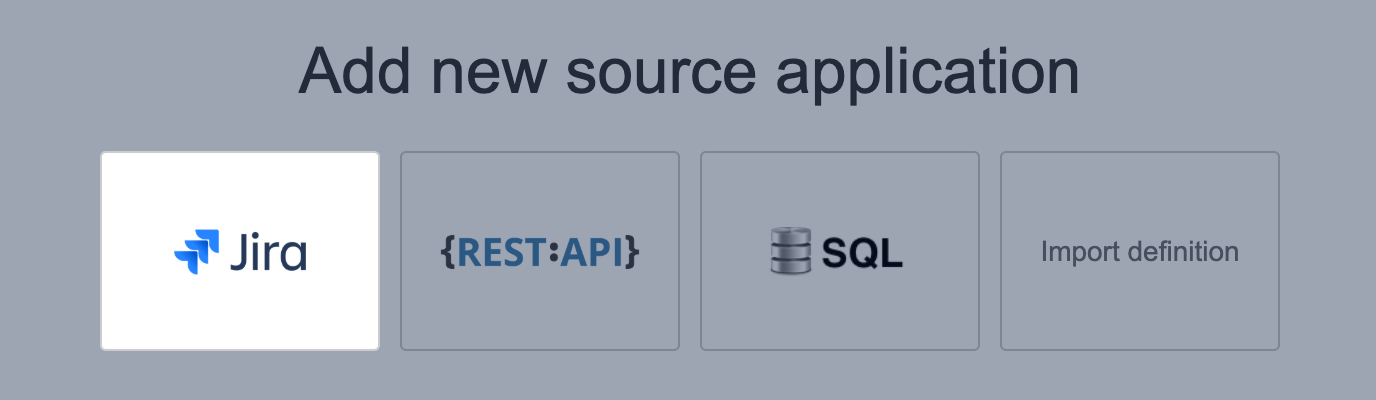
From the Source Data tab select Add new source application and then select the Jira application as a source application type.
The data import from Jira is authorized by the user who performs the initial data import: her Jira credentials are used to detect which projects and fields could be imported in this flex.bi account and are applied to all consecutive data imports (scheduled or manual). Inactive or non-existent users can't authorize data import: if the user access rights are changed in Jira (the user is deactivated or loses access to some of the selected projects), user authorization must be reset.
After that, the next screen Select application import options would be opened to continue the initial import setup.
Select application import options
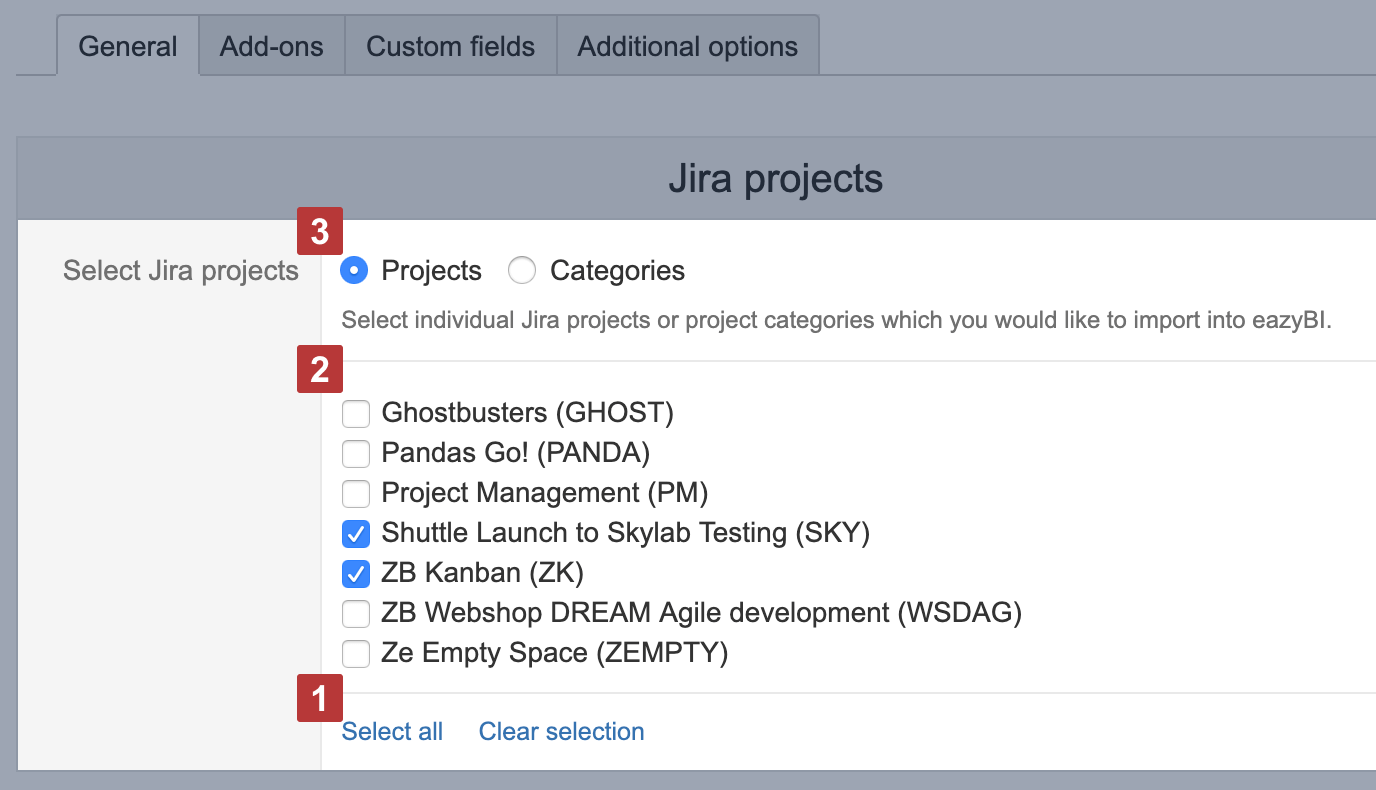
Select which Jira projects you would like to import in flex.bi. You can select all projects [1], list of chosen projects [2], or all projects with a particular category [3]. When a category for a project is changed in Jira, the project will be automatically deselected from flex.bi import, if the new category isn't selected. flex.bi will automatically detect selected Project type and will provide additional import options for Software and Service Management projects.
Statuses and history
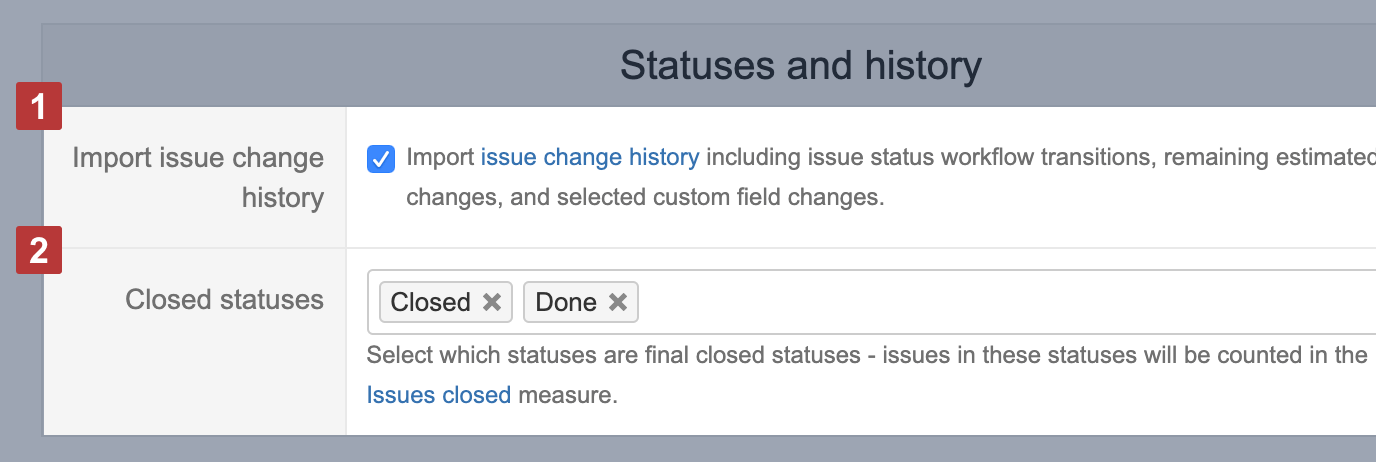
In the Statuses and history section select if you would like to import issue change history [1] as well as indicate Issues closed measure [2].
Option "Import issue change history" also should be selected if you want to import custom field changes (should be used together with option "Import value changes" for the custom fields and Sprints).
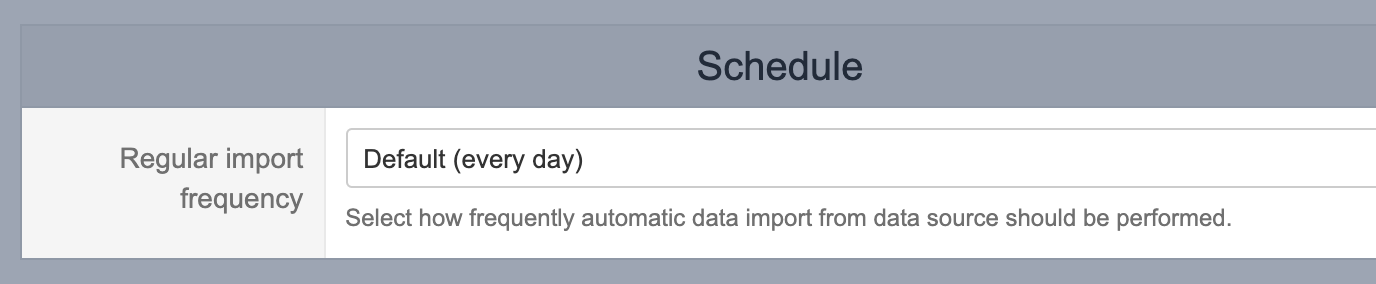
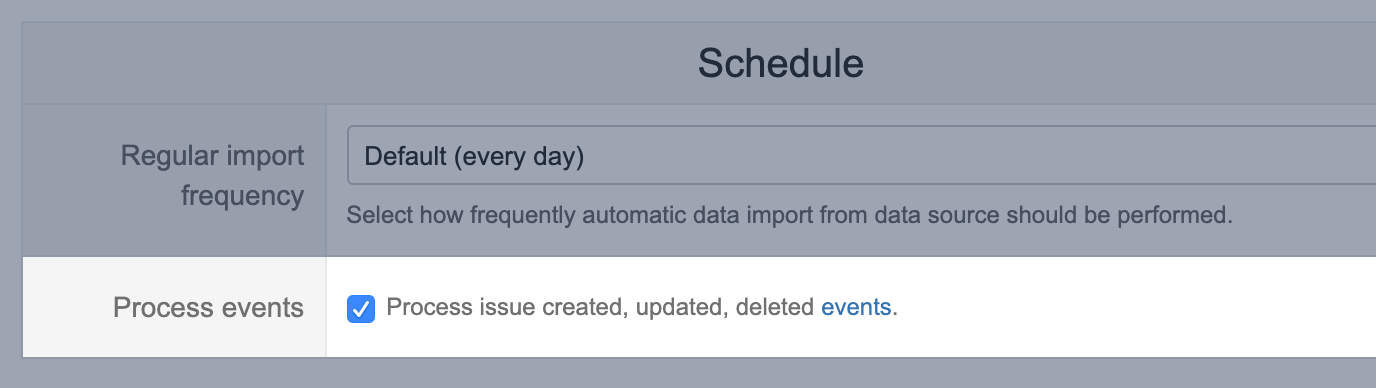
Regular import frequency
Specify how frequently you would like to schedule the regular Jira issues import.
If you have multiple flex.bi accounts, the sequence of pulling data in for them would be the same as the sequence these accounts had the last successful completed import.
If the scheduled data import fails with an error, flex.bi would automatically try to reimport data after 10 minutes and repeat these attempts nine more times. After the 10th unsuccessful import attempt, a notification email would be sent to the flex.bi account's owner and the user who authorized data import from Jira. If flex.bi can not detect the owner or authorized import user, the notification will be sent to the technical contact who is registered for the flex.bi app license.
Process events
When Process events is selected, flex.bi listens to the most important Jira Cloud webhooks and updates data every hour on issue creation, resolution, updates and deletion, sprint and board changes, and logged hour events. As a result, flex.bi reports will show issues information that is not older than 1 hour even if the Regular import frequency is set to default - daily
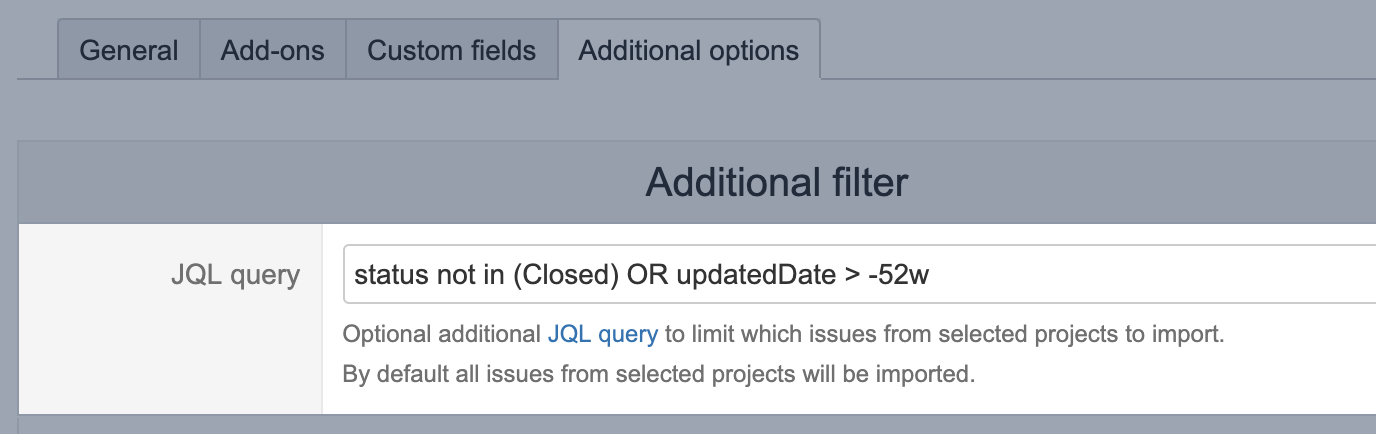
JQL query filter
If you would like to analyze a subset of issues from selected projects, you can specify a JQL query that would limit which issues are imported.
- To not import issues that have been closed for more than one year, you can use JQL
status not in (Closed) OR updatedDate > -52w - To import issues that do not have any security level, use JQL
level is empty - To limit by a saved Jira filter
filter = "Name of saved Jira filter"(the filter must be available to the user who authorized the data import from Jira)
It is not allowed to use the "ORDER BY" clause of the JQL query in flex.bi. Implementation of data import is using its own ordering of issues.
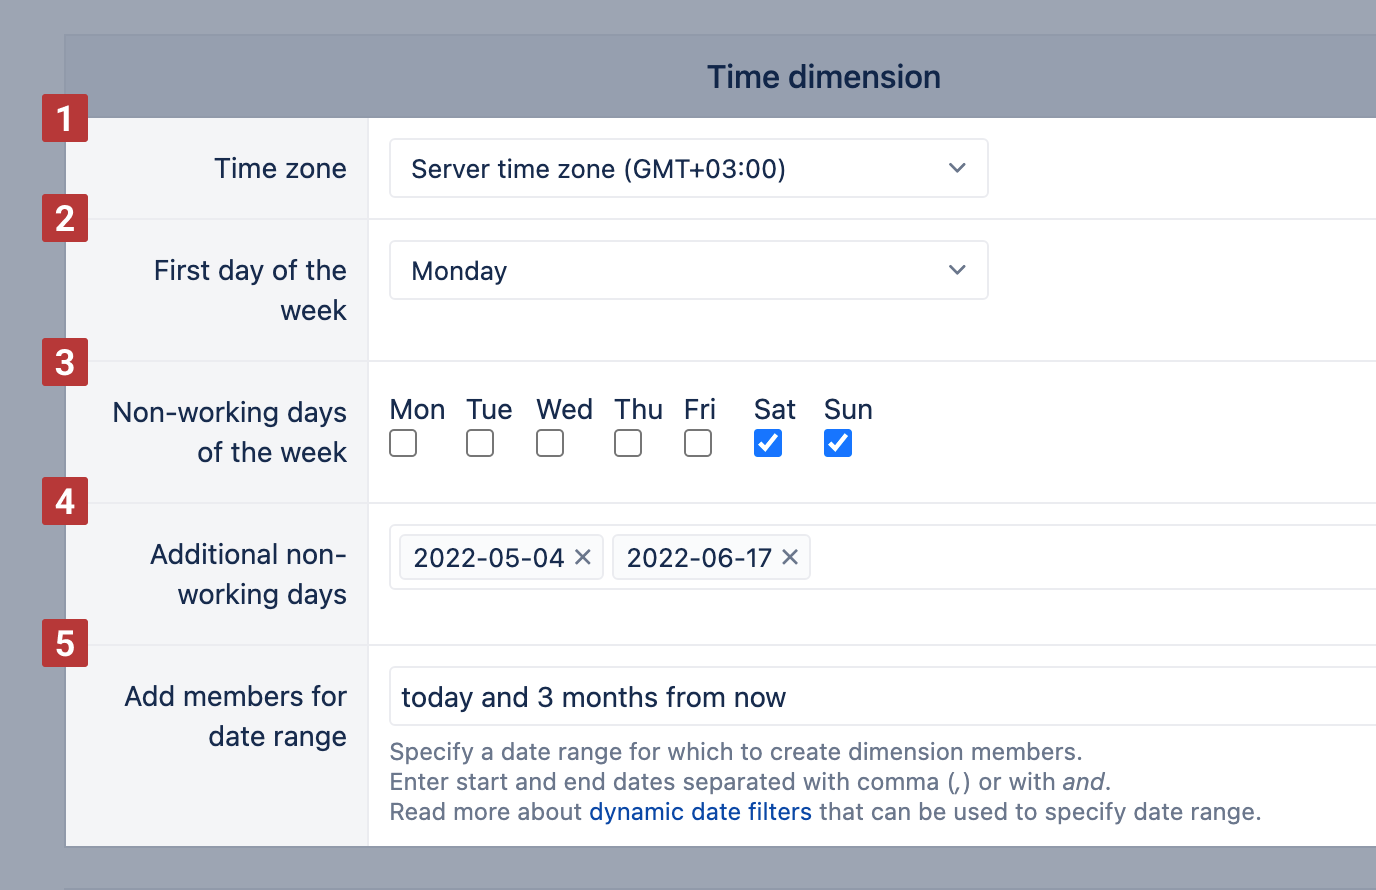
Time dimension
You can specify the time zone [1], the first day of the week [2] and non-working days [3] [4] of the Time dimension.
You can use only one time zone in each flex.bi account. The time zone of the Time dimension will be used to determine the date member in the Time dimension when importing issue measures (e.g. Issues created, Issues resolved and others) and issue properties. If a time zone is not specified then the default Jira server time zone will be used. If a different time zone will be selected then all date timestamps will be converted to this time zone.
The first day of the week [2] is used for the Time dimension Weekly hierarchy and also Week Day dimension.
Non-working days (standard non-working days of the week and additional non-working days/holidays) will be used to calculate the new workdays measures – Average resolution workdays, Average age workdays, Workdays in transition status, Average workdays in transition status. Non-working days of the Time dimension will be used also for DateDiffWorkdays and DateAddWorkdays MDX functions as a default non-working days argument.
If you have a long list of additional non-working days [4] then you can copy the list and paste in the time dimension options for the different flex.bi accounts.
It is possible to add members for date range [5] in the Time dimension (all hierarchies) to analyze reports not just by time periods where flex.bi finds activity in the project issues but also by future periods which can be useful for forecast and trend analysis.
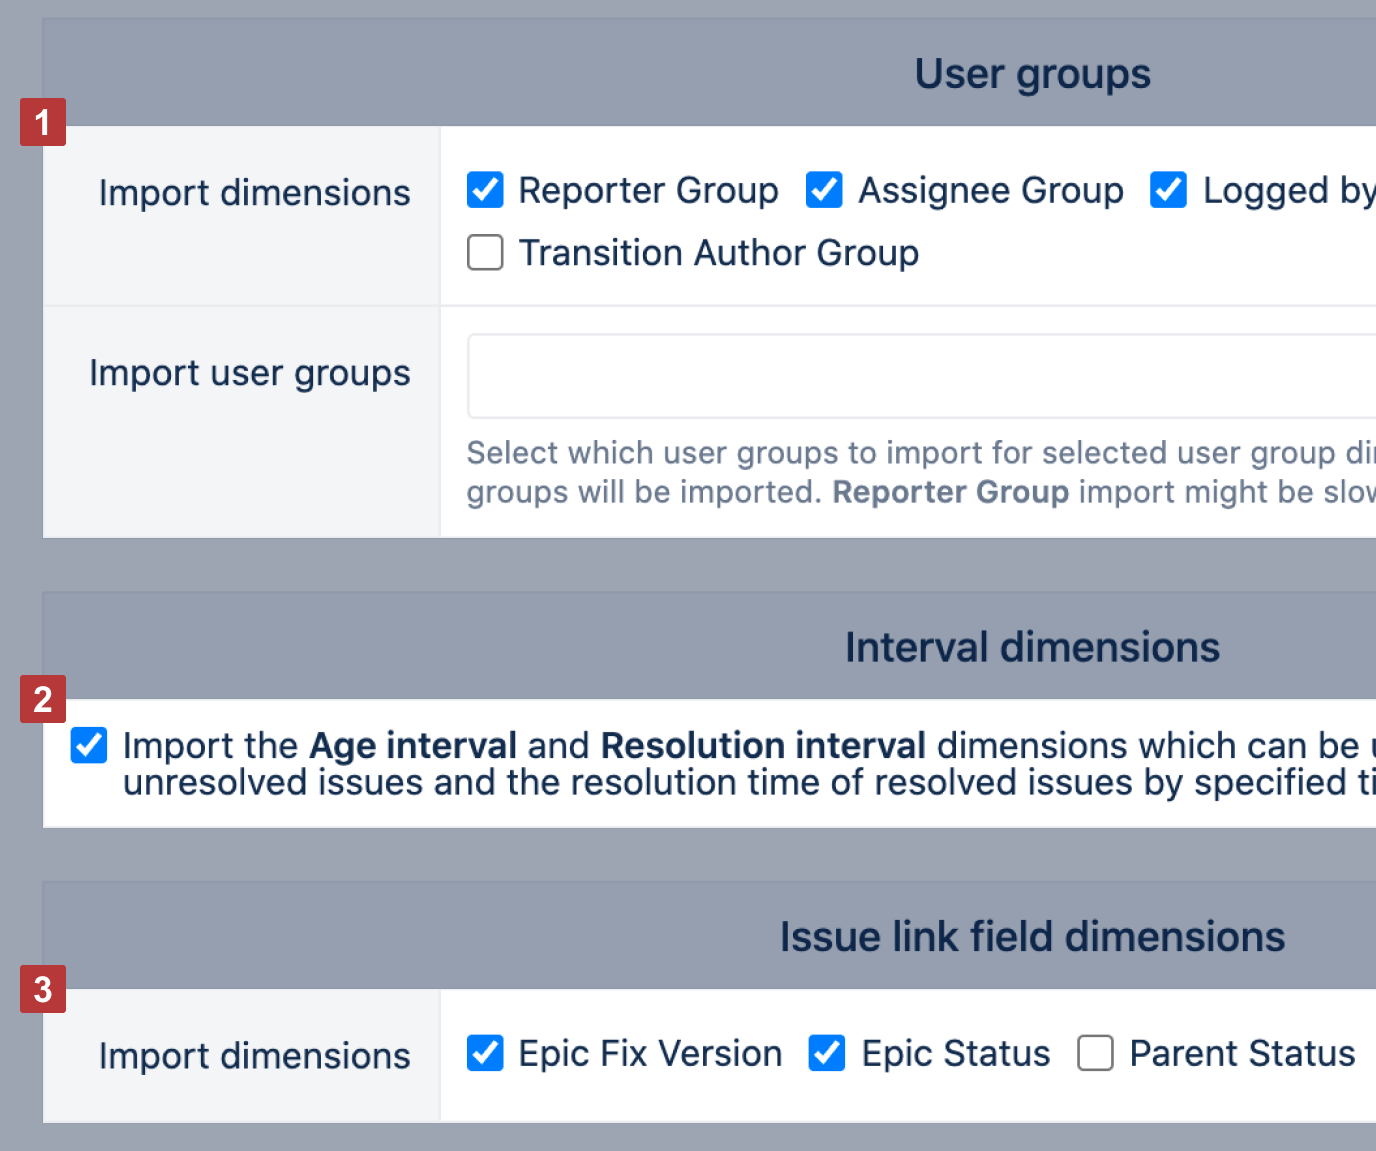
Additional dimensions for user groups, intervals, and issue link fields
You can import user groups for Assignee, Reporter, Logged by, or Transition author and specify set of groups you would like to use in your reports [1]. Select the option to import Age and Resolution Intervals dimensions [2] if you would like to create reports by unresolved issue age intervals or by Issue resolution intervals.
If you use issue hierarchy in the reports and would like to see issue data at one hierarchy level but filter by another hierarchy level, you might want to import issue link field dimensions [3]. For example, get all data by Fix version of the related Epic.
Sample reports
Select the option "Import sample reports" to get a set of reports created by flex.bi and have a first look at your data in flex.bi.

Template account
Select Template account [1] to import reports, dashboards, and calculated measures defined in a common template account. You can override [2] existing reports, dashboards, and calculated measures with reports, dashboards, and calculated measures from the template account.

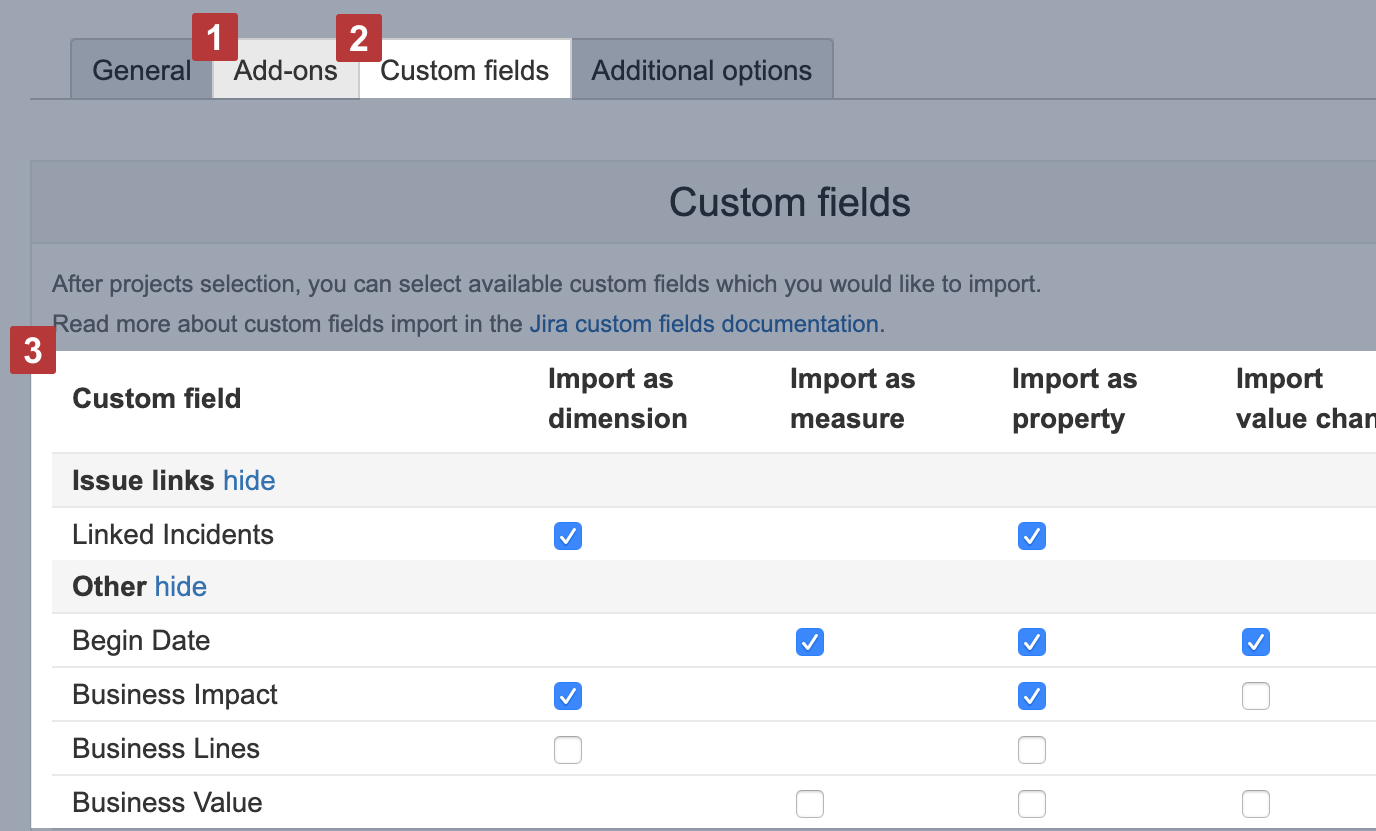
Jira Custom Fields
If you would like to import Jira custom fields then go to tab Custom fields [2] [3] or tab Add-ons [1] to import custom fields specific to Jira apps flex.bi has integration with [1]. And select custom fields you would like to import. And select either individual checkboxes (Import as a dimension, Import as a measure, Import as a property, or Import value changes) or click on a custom field name to select all available checkboxes for this custom field. Available import options depend on the custom field type or advanced settings for the custom field (if applied).
Select Import as dimension if you want to analyze total numbers by the custom field values (usually, these custom fields are used to classify issues by some parameter). If the custom field is specific for each issue and you just want to get this information when looking on a particular issue, import it as property.
If you want to get totals of numeric or date fields to import them as measures. In the result, a set of measures with totals of custom field numeric values or measures with custom date fields would be created.
If you want to see how numeric custom field values are changed over time, then import value changes.
Please select only those custom fields which you need for analysis purposes. Too many imported custom fields might slow down flex.bi reports.
Data import and import status
After specifying import options click Import to start Jira issues import background job.
In the Source Data tab, you will see the current status of the Jira import background job, as well as additional information - when the data cube was created, projects imported in this cube, imported projects, and a user whose credentials are used to authorize Jira for data import.
If you have many Jira issues and have selected many custom fields for import then the initial import might take a longer time to complete. In the Status column, you will see how many issues have been imported so far to estimate completion time.
Some data problems might not stop the import, but they will display in the warning message for the import status. The warnings remain visible to the user until dismissed manually. If you see such a warning, check if you can fix the data, dismiss the warning and rerun the import to have all your data imported.
Incremental import
After each successful Jira issues import, flex.bi will store a timestamp for processed Jira issues.
During regular Jira data import (either manual or automatic), flex.bi will import only those Jira issues which have been created, updated, or deleted since the last import. Incremental Jira data imports are much faster than the initial import.
If you change import options (for example, add an additional project or select additional custom fields), flex.bi will force a full re-import of all Jira issues.
Edit import options
Whenever needed, you can change the import options – select other projects or custom fields, change import frequency or enable/disable options. For that, go to Source Data tab and click Edit to open import options screen.
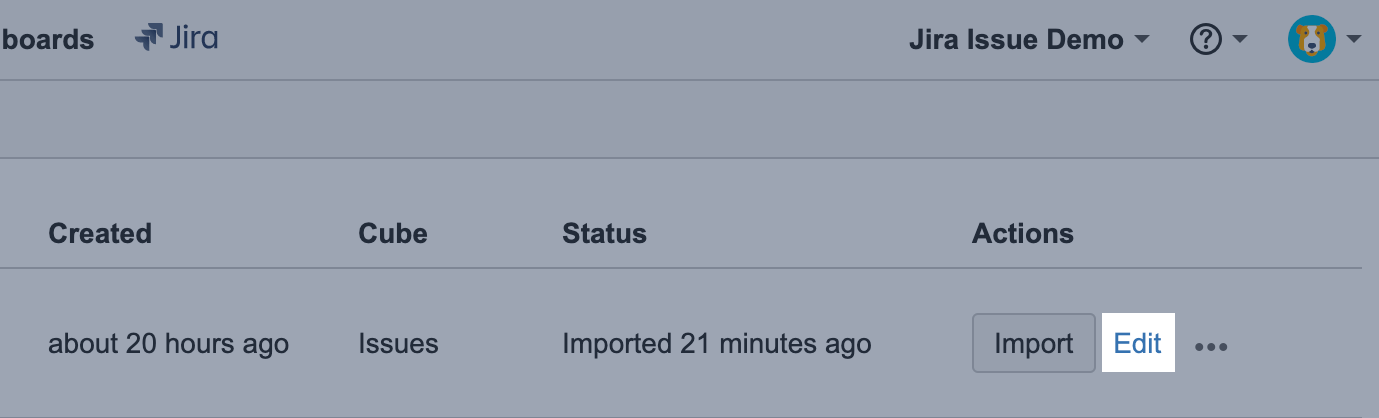
When import options are modified, click Import to start manual data import with applied changes or click Save to save them for later (the new options would be applied during the next regular import).
If you unselect projects from data import into the account, then it is advised to perform full data re-import. Otherwise, dimension members related to the previously imported projects are still available: while they have neither any related issues nor measures, their availability could be confusing for customers.
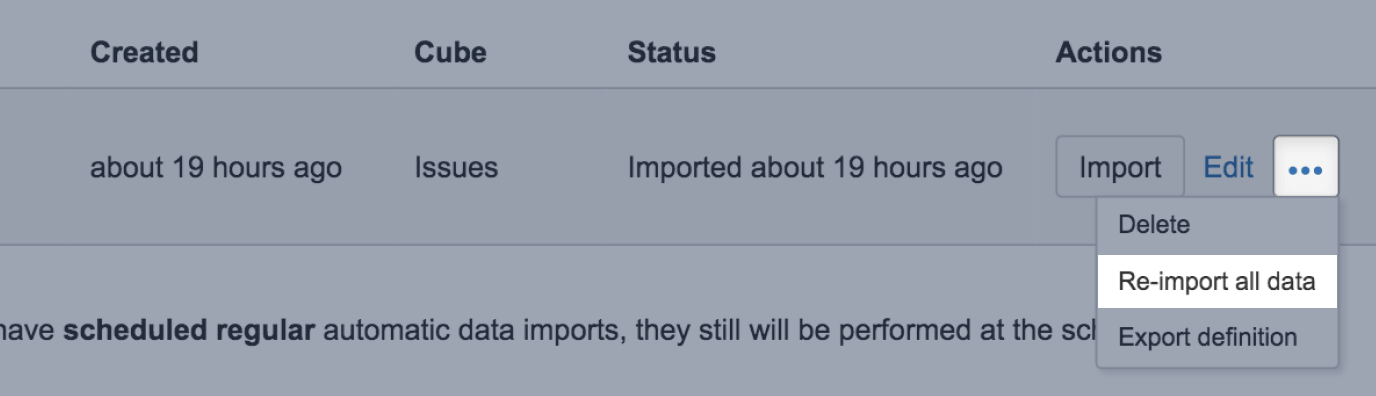
Re-import all data
In some cases, you may want to reimport just data (measures). During this import, Issues are not being deleted and reports will not appear empty until the import is completed.
This import would not delete dimension members but would add newly created dimension members. This can be useful when a numeric field is changed in Jira.
To re-import all data, go to Source Data tab and click Re-import all data.
Empty cube and re-import all issues
Sometimes you would need to recreate all dimension members (for example, new custom field value in Jira is created and used for issues). During this import, reports may seem empty as it reimports all issues (and other dimension members) from the beginning.
To re-import all issues, go to Analyze tab and click Empty button for Issues cube (it will delete just imported data but all created reports and calculated members will remain).
And then return to Source Data tab and click Import to start new re-import of all data.
If Jira configuration is changed then it is recommended to perform Jira re-index as otherwise Jira search API (which is used by flex.bi Jira import) might return incomplete results and as a result not all selected Jira issues will be imported in flex.bi. If there is a problem that not all Jira issues are visible in flex.bi then please perform Jira re-index and then do Jira re-import in flex.bi.
Reset authorization
When the user who had initially authorized Jira for data import is not available anymore (is inactive) or does not have permissions to the needed project, data source authorization should be reset to another user, otherwise, the next data import won't be successful (will end with error).
The new user has to be added to the account with Owner, User Admin, or Data Admin account user roles. The new user should log in flex.bi, open Source tab and click Reset authorization.
After approving this action, the Status will be changed to "Authorized" and a username of the new user will be visible under Source selection.
Open Edit import settings to select projects and custom fields available for the new user and perform data import.
After reset authorization, the user should run the first import manually. After the first manual import imports will run as scheduled automatically with the new user credentials.
If you import data from Jira apps that require an API key to access data, you might want to generate a new key for the new authorized user.
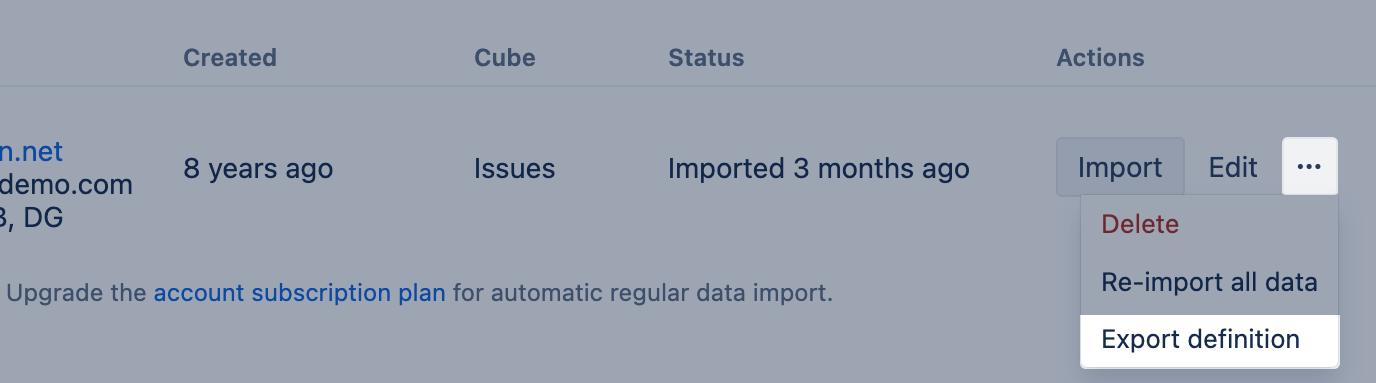
Export Jira source application definition
With the Jira source application definition export, you can share the Jira import options from one account across one or several others. We recommend using this option within the same flex.bi instance to ensure the same set of available projects, integrations, and custom field names. Typical use-cases are when you would like to copy the settings of one account and use them on a different set of projects or create a sandbox account to try out new solutions. However, if you would like to use one account as a template for many other accounts, you might want to use another option and create a Template account.
To export the definition of Jira source application, open the Source data tab, and click Export definition. Copy the definition.
To import the definition, create a new flex.bi account or open an existing one without a Jira source application. In this account, add a new source application and click on Import definition. Paste the definition and click Create.
After that, you will be forwarded to the Import options of the Jira source application. Please verify them and click on Import.